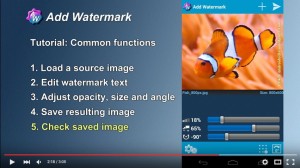
Add Watermark: How To Reuse Recent Watermarks (Profiles)

Since the new version 3.0 you can easy recall up to 20 recently used watermarks with all their properties. Like using profiles to quick switch between many predefined settings. How this works:

Each time you save resulting image the app stores all watermark settings in the list “Recent texts” or “Recent images” depending on the current watermark type.

To reuse one of last used watermarks please follow the steps:

  • Open Settings (pressing edit or gear button)
  • Go to Text or Image settings depending on your need
  • Press button “Recent texts” or “Recent images”
  • Choose an entry from the list
  • You can see immediately the loaded settings
  • Close Settings (pressing the back button) to see how the watermark looks on the preview
  • Now you can save the resulting image

screenshot_2016-12-19-12-33-33    screenshot_2016-12-19-12-34-06    screenshot_2016-12-19-12-34-57

Tips:

Please don’t forget: as a confirmation you need to save your resulting image to make sure your new/changed watermark’s properties can be recalled from the recent list.

If you apply changes to a recent watermark, they will be updated while saving resulting image until you change the watermark content itself (text or watermark file name). Then it will be saved under a new name.

After a new installation the list “Recent texts” already contains a preloaded set of watermark samples. Try them out!

The earlier watermarks (>20) will be replaced with last ones. Last saved comes always up in the list.

List of “Recent images” saves both types of image watermarks: built-in stickers and user’s custom logos.

Add Watermark: How To Process Multiple Images From Dropbox

When you are storing your images in Dropbox cloud, you may be wondering, how to watermark more than one image using batch mode. Because currently in Dropbox you can select only one single file to send it to another app.

Please find below a workaround. To say it short, you need first to download images to device.

1. Start Dropbox and mark needed images, then save them to device (use three point menu > save to device):

Inline image 1
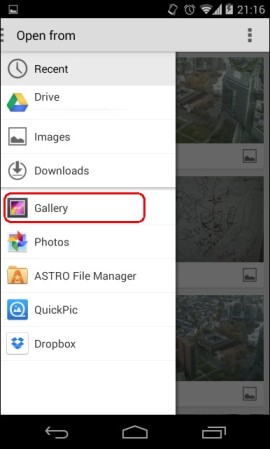
2. When they are saved (you can see the status on icons), open Add Watermark, select source (+) > process multiple images
3. Navigate to the Dropbox folder – it looks similar to
/sdcard/Android/data/com.dropbox.and.android/files/XXXXXXX/scratch…,
select all images, then process them.
I don’t recommend to process more than 100 images at once, as it can take very long time (few minutes).
Inline image 2

Add Watermark: How to use your own fonts for text watermark

Since version 2.8.6 you can import up to 20 TrueType or OpenType fonts to the app (only 1 custom font in the free version).

Just copy your font files (extension .ttf or .otf) to the folder “addwatermark/custom_fonts” on your device. This folder is automatically created after app installation.

Screenshot_2013-07-08_20-31-07

When you start Add Watermark, you can see now the custom fonts (Settings / Text / Font), added to the build-in fonts starting with numbers [1]..[20]:

Screenshot_2013-07-08-20-18-54

Please note, if you can’t see a custom font in the app, the file might have a wrong format or is corrupted.

Add Watermark: How to quick share a watermarked photo on Facebook

With Add Watermark you can quick upload an image to a popular social service like Facebook, Twitter, Flickr etc. and share it with your friends.

You don’t need to enter your login data directly in Add Watermark, but you need to have an app of your social service installed on your device. The most of these services have an official app for Android.

For example, for Facebook follow the steps:

1. If not already installed, install the official Facebook for Android from Google Play and make sure that you are logged in.

2. Start Add Watermark and load an existing image or take a new photo, adjust the watermark.

3. Press “Save” button, in Save Dialog select “Action when done” > “Share image”, press “Save”.


4. In the list “Share image via” select your Facebook app, you’ll see a new post with the image. Add a comment, choose audience and press “Post”.


Your image is now in your Facebook-timeline:

Watch “How To” video:


Add Watermark: How to post a watermarked image by Email to Facebook, Twitter etc.

The easiest way to upload a picture to a web service is described here:
How to quick share a watermarked photo on Facebook

The alternate way is the following:

The blog sites and social web services like Twitter, Facebook, Flickr, WordPress and Co. supports upload of pictures by email. Sending an attached image to an specific email address will post it to your personal site on this web service.

At first you need to know the specific email address of your web service:

  • Facebook:
    Find your custom email address under “Account” / “Account Settings” / “Mobile” section / “Go To “Facebook Mobile” / “Upload via Email “. Add it to your contacts, say “Facebook by Email”.
  • Twitter:
    Visit www.twitpic.com and connect it to your Twitter account. On the twitpic site, open “Settings” / “Mobile” tab,  you will see an email address.  Save this twitpic email address as a new contact in your phone (say, “Twit by email”). The email subject is used as your twit’s contents (max. 160 characters).
  • Flickr:
    Configure your Flickr account to accept image uploads via email. Flickr will provide you with a secret email address. Add it to your contacts, say “Flickr by Email”.The title of the image is the email subject, the image description is the message body.
  • For some other web services it works similarly.

When you know the specific email address you just need to add a watermark to your image:

In Gallery, select an image and press “Share” / “Add Watermark”.

Or start “Add Watermark” and take a picture with the build-in camera or select a source image you want to post.

You will see the loaded image in preview area with a predefined watermark.

Adjust the watermark (for more options – see menu Settings).

Press  “Save” button.

The “Save Dialog” will appear. Select “Share image” in “Action when done” and press “Save”. In the list “Share image via” select your email client. Enter the specific email address (of your web-service, s. above), the subject and press “Send”.

Done!


Link to install Add Watermark Free from your Android phone.
Link to the web-version of Google Play

Add Watermark 1.2 released

(More about Add Watermark here)

Changes in version 1.2:

  • Added feature to change watermark font in text mode:
    Select font

    and “stroke” effect for text (additionally to shadow effect):
    Stroke effect
  • New feature in “About” – “Send bug report” (send a Email with automatically included device info);
  • Small visual improvements, some bugs fixed.

Link to install Add Watermark Free from your Android phone.
Link to the web-version of Android-Market